FloydHub quickstart tutorial
Posted on April 15, 2017 in Tutorial • 2 min read
When you want to train your neuron nets but don't have Nvidia GPU, you might then need to train it on cloud. FloydHub is a relatively easy and cheap way to do this. Although the document of FloydHub is already intuitive enough, I will go through the setup quickly here to give you a more intuitive way of using FLoydHub.
Install floyd on your computer
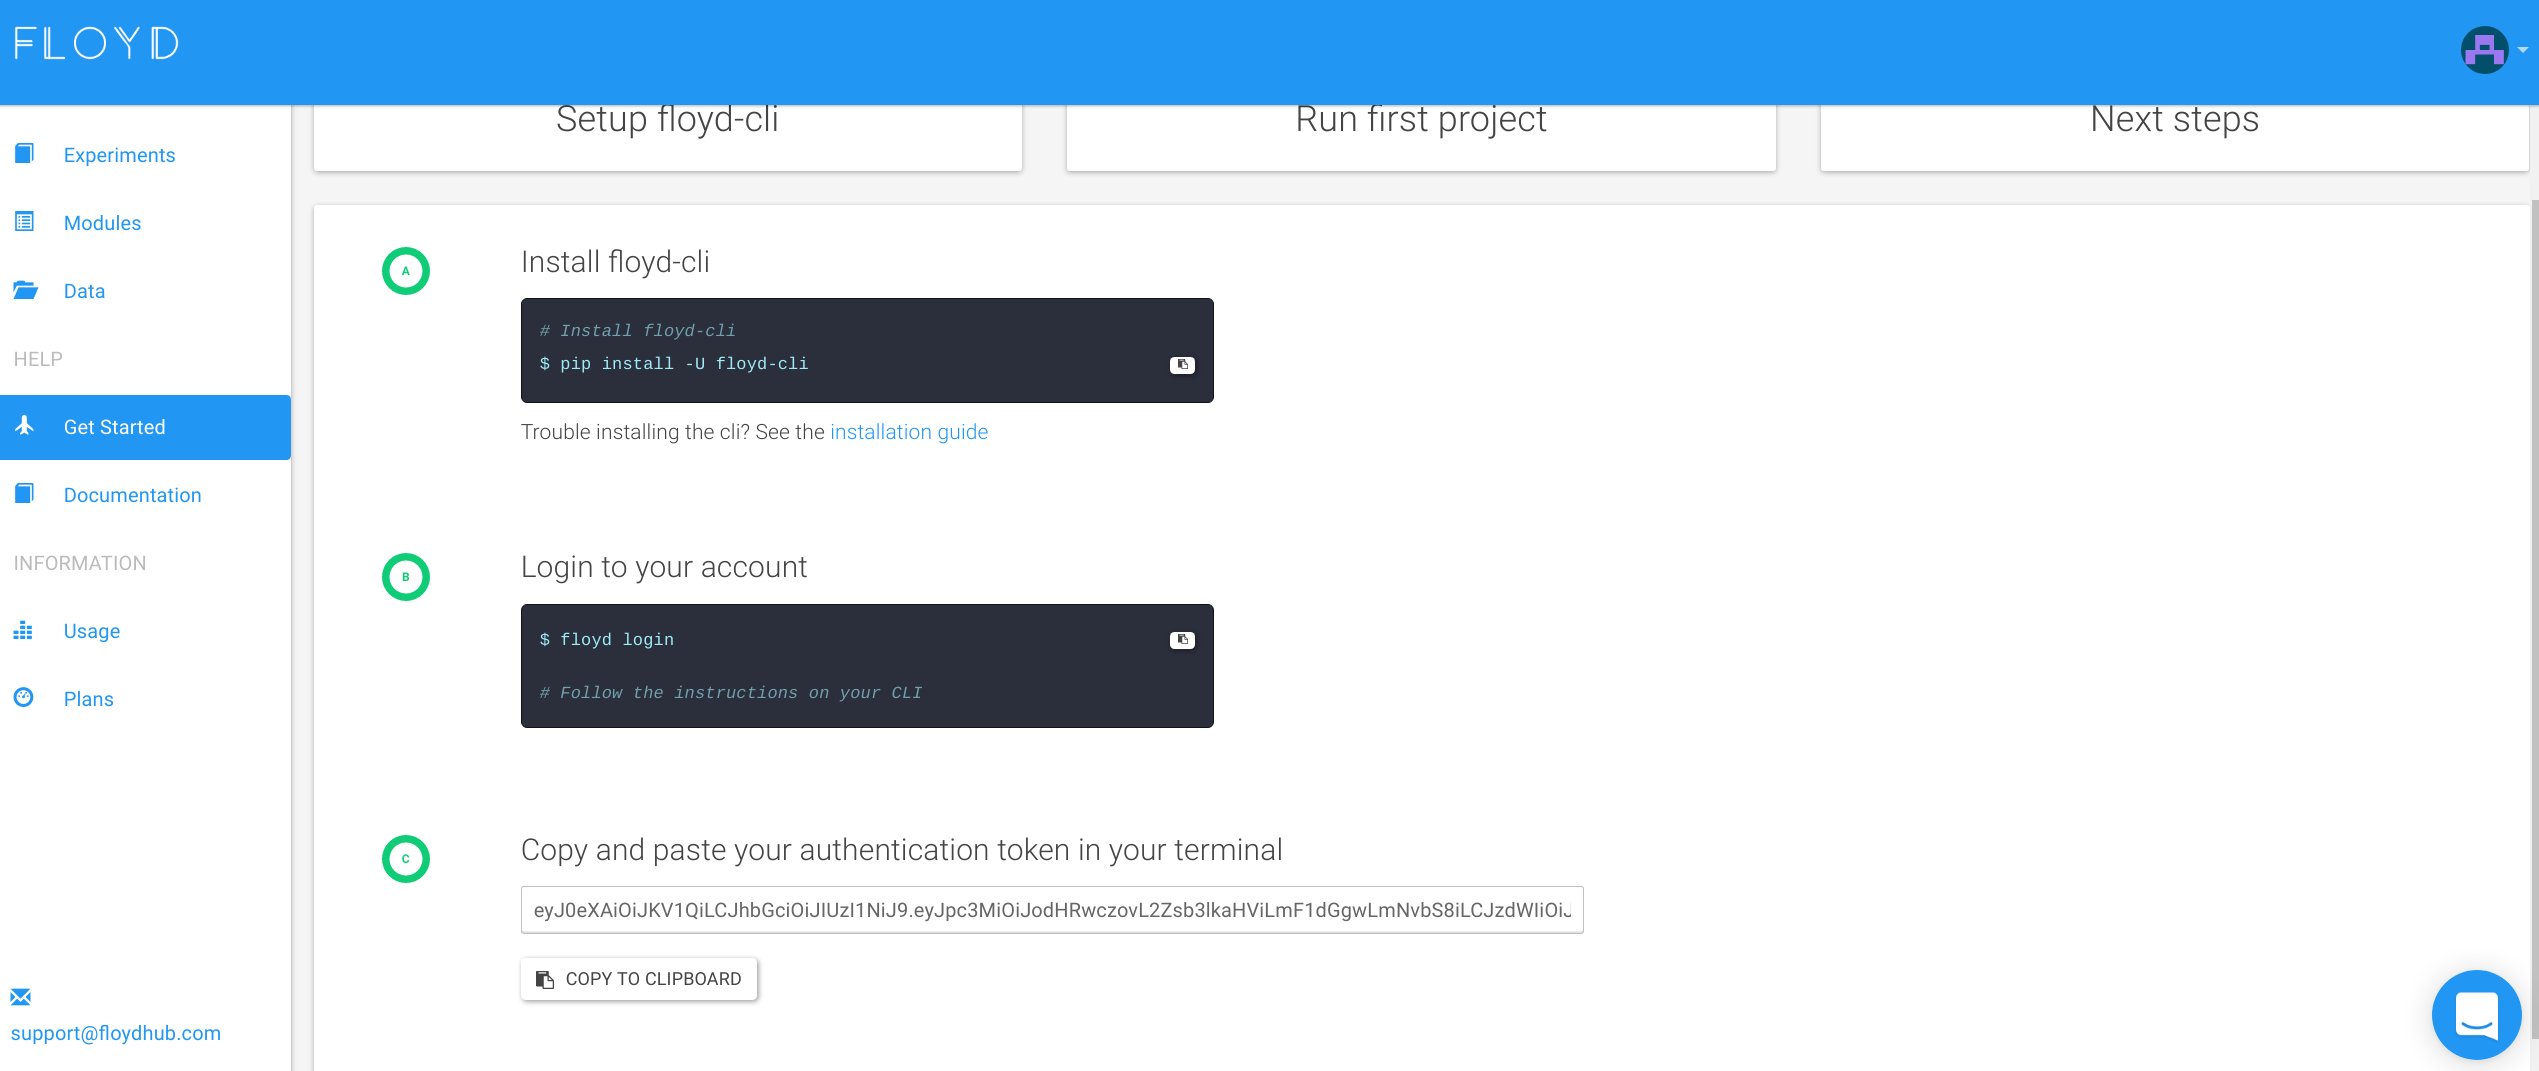
After sign up, you will login into the Floyd console, you will see:

Follow the 3 steps. Notice: when you Copy and paste your authentication token in your terminal, you will not see it, so just copy and hit ENTER.
Upload your data
In most of cases, you will have a input directory where you put every data for your project. Below shows how to upload your data to FloydHub:
- Neviagte to your input folder, (which might contain several data files)
- Type
floyd data init [someRandomName]in your terminal to initialize - Then type
floyd data uploadto upload data to your Floydhub
Then you will see sth like:
$ floyd data upload
Creating data source. Uploading files ...
DATA ID                 NAME                          VERSION
----------------------  -------------------------    ---------
GY3QRFFUA8KpbnqvroTPPW  yourName/someRandomName:1            1
Floyd will generate a data id for the uploaded dataset. This uploaded dataset can be used in your future experiments, which I will talk about it in the next part.
Run your neuron net work
Now it's time to train your NN!
- Nevigate to the folder where your script lies(
train_cnn.py) . (which also might contain several files) - Type
floyd init [randomProjectName]in your terminal to initialize - In our case, where:
- we want to use our own data and have already uploaded it.
- want to train on GPU
- want to run in a preinstalled environment with tensorflow-1.0
- We can just type
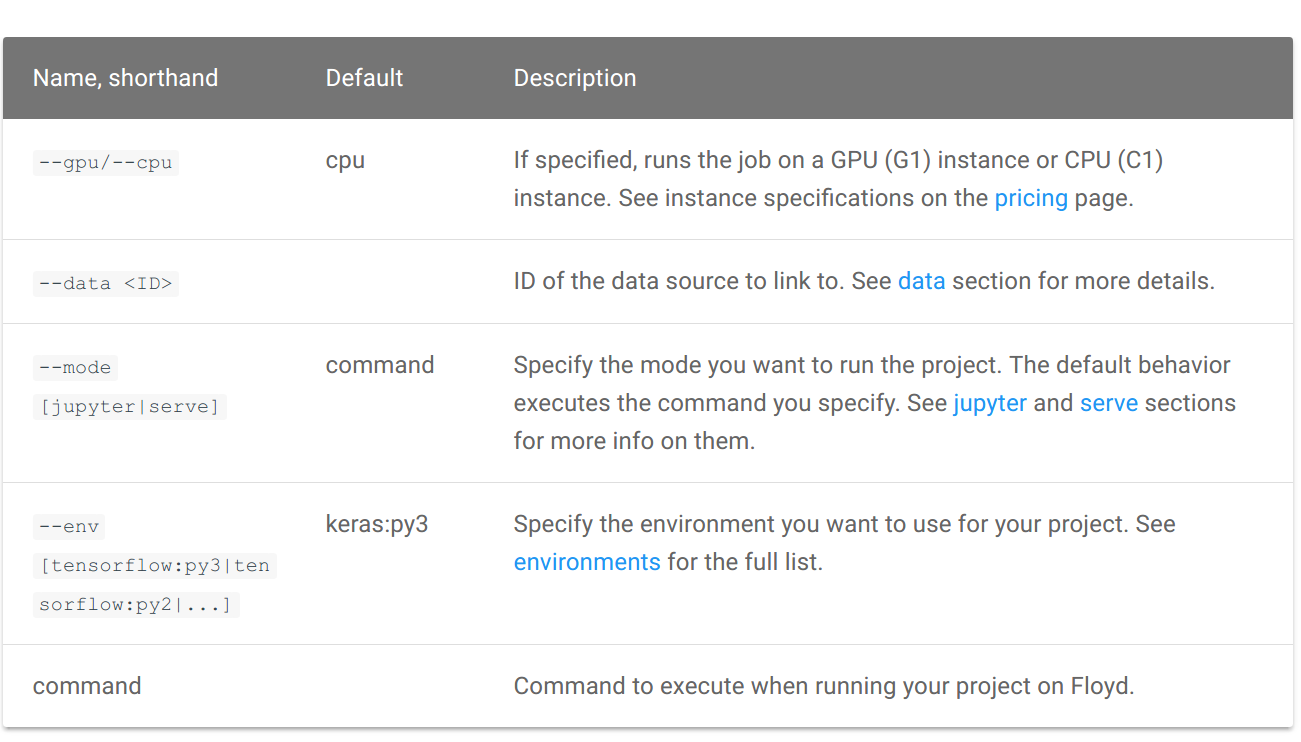
floyd run --gpu --data [changeItWithYourOwnDataidYouGotJustNow] --env tensorflow-1.0 "python train_cnn.py"

That's it! your neuron network will be trained on FloydHub now! Type floyd logs [experimentId] to see details(print,warning,error)
NOTICE: You must know that:
When you run your project with --data [changeItWithYourOwnDataidYouGotJustNow] . It means that the data will be available at the /input path. Eg.
pd.read_csv('/input/datafilename.csv')
So, make sure your path is right!
Get the results
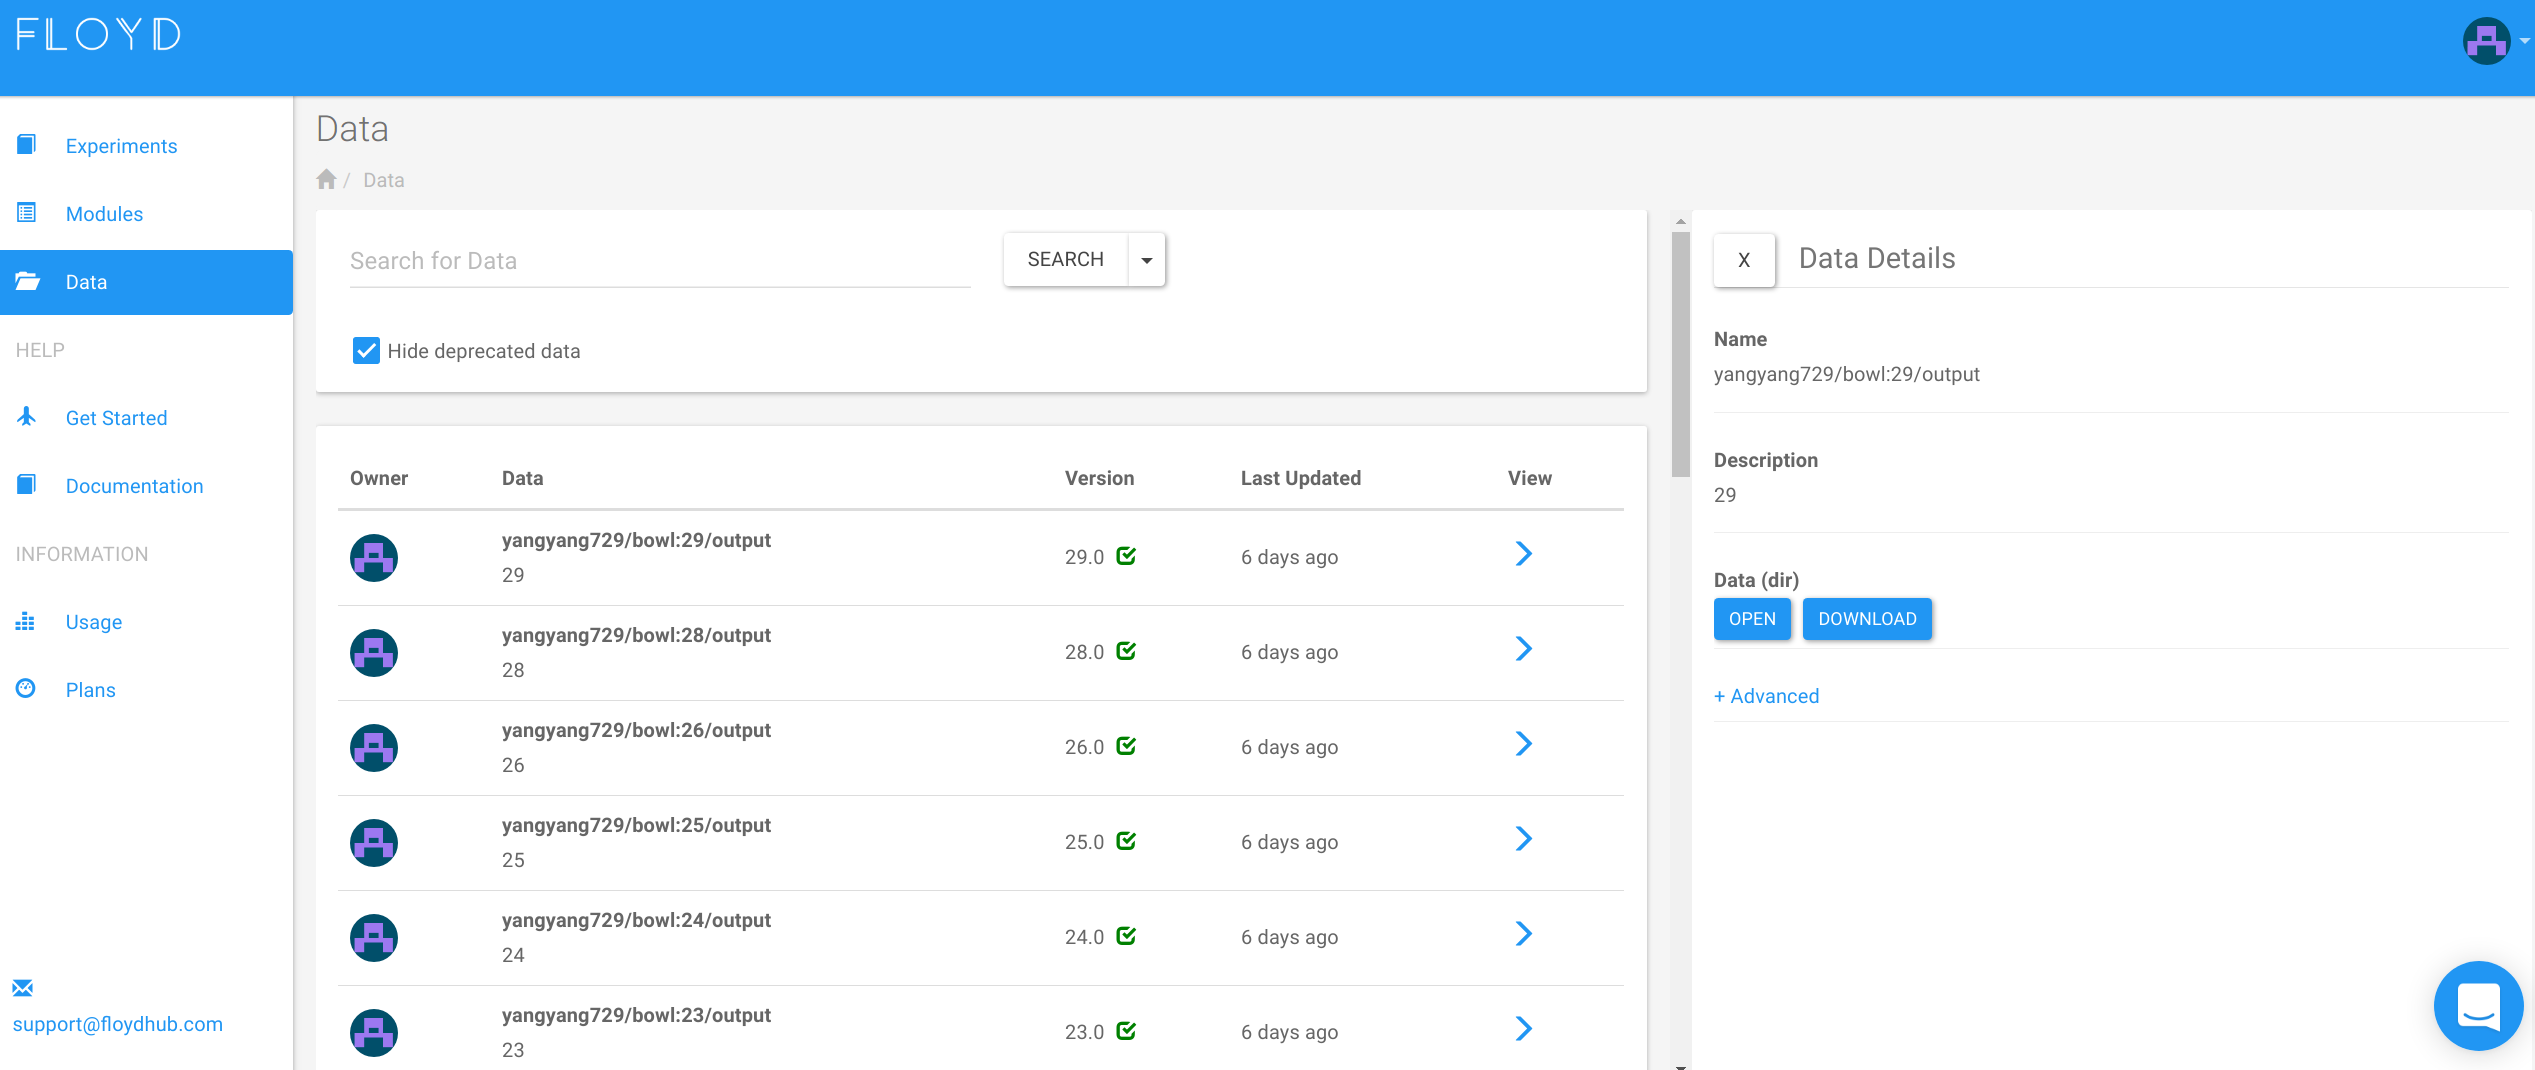
If succeed, you will get your output via this:

Simply click Download button.
Lastly
FLoydHub provides every new user with 100h(45$ credit) access to a K80 GPU with 12G memory! That'll be enough for you to play with it.
And this tutorial aims at giving you a snapshot of floyd, there are also many other applications(run jupyter notebook etc.), you might want to see the document.